Amazing Italian Meatballs and Marinara Sauce Three Ways

In 1990, famous chefs from around the world gathered in Monte Carlo to celebrate the 70th birthday of noted food writer, Craig Claiborne. Instead of gifts of monetary or material value, Claiborne requested that each chef give him a hand written recipe. One can only wonder what a collection of treasured recipes he collected that evening.

Hand written recipes remain, to me, a great gift. Yes, the quantities are often vague (ie. a “handful” of this and a “pinch” of that). There may be detailed instructions. Or not (ie. “bake it until it’s done.”) Certainly the art of sharing recipes written on 3×5″ index cards is not commonplace these days. Which makes them even more special. And when a recipe has been handed down from generation to generation, you know it’s a keeper.

These meatballs and sauce are no exception.

Years ago, one of my husband’s co-workers was raving about her husband’s grandmother’s Italian meatballs and sauce. She was kind enough to write down the ingredients and some basic instructions which we followed to the letter. The results were nothing short of exceptional, and hopefully this recipe will be passed on down for generations to come.

THE MEATBALLS

There are two teams when it comes to meatball making: #TeamBrown and #TeamSimmer. This recipe falls in the latter category. I have to say I’m with nonna on this one as well. Simmered meatballs are incredibly tender, pick up the flavor of the sauce, and retain their shape. This recipe calls for a combination of ground beef, pork and veal along with seasoned breadcrumbs, Parmesan cheese and eggs. Rolled into balls then simmered slowly in the sauce until they’re melt-in-your-mouth tender. They also freeze well, so we always triple the recipe, then freeze them so they’re ready to go anytime.

MARINARA SAUCE THREE WAYS

Why three ways? Because it’s nice to have options!

Sauce #1 “The Real Deal” This is the original nonna’s sauce that accompanied the meatball recipe. And much like the meatball recipe, this one is a classic. So easy to make with ingredients you probably have on hand. Incredibly versatile and like the meatballs, you can make a big batch and easily store in the freezer.

Sauce #2 “Gardener’s Delight” is a bit more labor intensive. OK….a LOT more labor intensive actually. But, if you happen to be a gardener and grow tomatoes, I will be linking to an incredible sauce from one of our favorite cooking and gardening bloggers: Kaleb from Wyse Guide. Interestingly he states the recipe comes from a church cookbook his mom had when he was growing up.

It is a good day’s work, between processing your tomatoes, then prepping the ingredients, simmering the sauce then finally canning. But good heavens there’s nothing like cracking open a jar of that sauce in the middle of winter and tasting all the bright flavors of the summer garden.

SAUCE #3 “Store Bought is Fine” Finally, completely opposite from Kaleb’s recipe is Option three, which is purchasing a jar of already made sauce. There are so many options available but many food fans agree (myself included) on one brand that rules the sauce world. I will link to that as well. Hint: it’s Ina Garten’s favorite “store bought” sauce as well 🙂

Until next time, eat well, be well and love lots ❤


AMAZING ITALIAN MEATBALLS and MARINARA SAUCE THREE WAYS

Meatballs:

  • 1 to 1-1/2 pounds of ground meat (any combination of beef, pork and or veal) (See Note 1>)
  • Salt and pepper to taste
  • Approximately 3/4 cup Italian seasoned dry breadcrumps
  • 1/2 cup grated Parmesan cheese or a combination of Parmesan and Romano
  • 1 egg, beaten
  • Milk as needed (per instructions)

Directions:

Lightly break up meat into a large mixing bowl. Add salt and pepper to taste, then breadcrumbs, cheese and egg. Pour in one cup of milk, then gently hand mix the ingredients. Do not overwork! Add additional milk if mixture is too dry.

Shape into balls about the size of golf balls. (See Note 2>).

Place meat balls into simmering marinara sauce, cook until done, about 30 minutes on low simmer (about 45 minutes if cooking from frozen).

Serve immediately over spaghetti. Serves 3-4 (approx. 9 to 10 meatballs in total)

Note 1> I’m going to get very specific here, because this is IMPORTANT. Your meatballs will only be as good as the quality of the meat that goes into them. For ground beef, I only buy either freshly ground beef from my butcher or grass fed beef. Superior flavor and texture. Too many chain grocery stores sell cheap, stringy ground beef which will make your meatballs tasteless and tough.

For this recipe, I use equal parts lean ground beef (90% lean), ground pork and ground veal. You can omit either the pork or veal, or both, if you’d like.

Note 2> We’ve found the ideal size to be just slightly larger than a golf ball. With that size, for 1# of meat, you should get about 9-10 meatballs. A kitchen scale does come in handy for measuring out equal portions.


Marinara Sauce #1″The Real Deal”

  • 1 large can (28 oz.) crushed tomatoes (favorite brands are Cento or Muir Glen organics)
  • 1 can (6 oz) tomato paste
  • 1 can (15 oz.) tomato sauce or passata – OPTIONAL (See Note 1>)
  • 2 cloves garlic, minced or pressed
  • 1 small onion, chopped (see Note 2>)
  • 1 tsp basil
  • 1 tsp salt
  • 1 tsp black pepper
  • 1 celery stalk, cut into 4-inch pieces

Directions:

Place tomatoes and tomato paste in a pan, plus one can (from tomato paste can) of water. Add additional canned sauce, if using.

Add remaining ingredients, simmer on low heat, stirring occasionally, until slightly reduced, flavors are concentrated and onions are cooked through, about 30 minutes. Remove celery and discard.

Makes enough for 1 lb. spaghetti.


Note 1> If you feel the amount of sauce is adequate using just the crushed tomatoes, paste and water, then no need to add additional sauce.

Note 2>You also have the option of sautéing your chopped onion and garlic first until slightly softened. Then add the tomato products and proceed with the recipe as written.


Marinara Sauce #2 “Gardeners Delight”

Kaleb Wyse is the Midwestern gardener/cook, and creator of our all-time favorite garden marinara sauce. If your tomato garden runneth over, and you have the patience and time for canning, this is the sauce for you! Fresh, processed tomatoes are slowly simmered with onions, fennel, garlic and plenty of fresh herbs. The sauce is incredibly rich and complex. Opening a jar in the middle of winter is one of life’s greatest pleasures.

Kaleb’s Spaghetti Sauce and Canning Instructions

If you’re going to tackle this one, I highly recommend viewing the video first for some handy tips. And, even if you’re not ready to tackle this sauce, check out Kaleb’s blog Wyse Guide – many great recipes, gardening and decorating/lifestyle ideas. The best of the Midwest!


Marinara Sauce #3 “Store Bought Is Fine”

Bottom line: if this is Ina Garten’s go to store bought sauce, that’s all the endorsement I need! Popular food blog The Kitchn also recently named Rao’s #1. Rao’s was always my brand of choice as well (before we started canning our own). Wonderfully balanced flavors. All natural and very important to me: no added sugar! So. for the perfect quick weeknight dinner, simmer some of the delicious Italian Meatballs with a jar of Rao’s. Serve over spaghetti and pass the Parm!

Bruschetta with Goat Cheese & Black Olive Tapenade

I’ve always said the mark of a great dish is one that silents the room. That makes you stop, savor and want more. Enter black olive tapenade (aka “Tapenade Noire”). Hardly a newcomer to the culinary world, it dates back to the 1800’s when it was first invented in Provence, France. At its purest form, it is a ground blend of black olives, capers, anchovy and olive oil – all the sunny flavors of the Mediterranean.

A few weeks ago, we invited our friend and fellow gardener, Sharon and her husband to dinner. We chatted about all things plants and birds before turning our attention to the lovely bruschetta she brought for an appetizer. The perfect blend of briny, savory and salty on top of a creamy layer of goat cheese. A few additions to the traditional French recipe make this exceptional, including sun dried tomatoes, brined peppercorns, garlic and fresh basil. This recipe had been passed down to Sharon from another friend Joan.

As they say “this one’s a keeper”!

Black Olive Tapenade – This wins on so many levels most notable being an excellent “pantry” appetizer. Wth the excption of the fresh basil, the other ingredients can be purchased ahead of time and stored in your pantry or fridge. Making this THE perfect, last minute appetizer. The only ingredient that may prove challenging are the brined peppercorns. Look for them in the pickle aisle of your grocer (usually next to the capers). I scored some at our local Pete’s Fresh Market in the Chicago suburbs. Also available online from The Spice House.

The tapenade can also be made well in advance and in fact, it should be made ahead of time and refigerated so the flavors can deepen.

Consider, too, the many ways you can enjoy tapenade beyond bruschetta:

  • Serve as a dip with pita pread or crackers
  • Swirl into hummus
  • Add to a charcuterie or cheese board
  • Top hard boiled egg halves with a teaspoon of tapenade

Goat Cheese & Bread – I recommend leaving the cheese out at room temperature for about an hour prior to assembling. If goat cheese isn’t your cup of tea, you can certainly substitute cream cheese or even a combination of cream cheese and goat cheese. You can also substitute Melba Rounds for the bread as well to save time and effort.

Until next time, eat well, be well and love lots ❤


BRUSCHETTA with GOAT CHEESE & BLACK OLIVE TAPENADE*

  • 14 oz. drained pitted black olives (either canned or from deli)
  • 2 oz. drained oil packed sun dried tomatoes
  • 2 TBS drained capers
  • 1 TBS drained green peppercorns in brine
  • 6 TBS olive oil
  • 1 tsp anchovy paste (optional)
  • 2 cloves garlic
  • 3 TBS chopped fresh basil
  • Salt & pepper to taste
  • 1 loaf French bread or ciabatta or Melba toast crackers
  • 4 oz. plain goat cheese at room temperature

Place all ingredients for tapenade in a food processor until finely chopped, scraping down sides as necessary.  Taste for seasoning, adding additional salt, pepper, olive oil or anchovy paste as needed.  Transfer to a bowl, cover and refrigerate at least 8 hours or overnight.

Before serving, bring goat cheese to room temperature.  Slice bread, brush with olive oil and lightly toast in a skillet. Spread goat cheese onto each round and top with a spoonful of tapenade. 

Yields about 18 pieces (leftover tapenade can be refrigerated for several days.)

* Many thanks to Joan who passed on this recipe to Sharon, who passed it on to me. I just tweaked it a bit adding the anchovy paste, but by all means you can omit if that is not your preference. 🙂

Thai Beef with Basil

Thai Beef with Basil has been a favorite meal of ours going all the way back to our honeymoon in San Francisco, where my husband had a version of this dish that was so spicy, I almost called the fire department to put out the flames. Yet despite the incendiary nature of the dish, he was hooked.

Thankfully, all subsequent encounters have been less 5-alarm hot. Ultimately we learned to make this at home where the heat can be controlled and the perfume of the Thai basil creates a perfect counterpoint to the peppers. In the summer, when Thai basil and peppers are plentiful in our garden, this is on the menu weekly.

So a few notes about the ingredients in this dish. True, you won’t see Thai basil in many supermarkets. I remember being absolutely thrilled to find some last winter at my most awesome store Pete’s Fresh Market and grabbed just about every box on the shelf.

We love it so much, and grow our own from seed every year (Siam Queen Variety). The plants have a lovely, compact growing pattern and vibrant purple flowers, making this an herb that is as beaufitul as it is flavorful.

You may 100% use sweet basil in this dish and don’t skimp!

Now let’s talk peppers and spice. Again, lots of flexibility here. After years of experimenting with different peppers, we settled with serrano peppers as the variety that provides enough kick. If you’re a bit timid about the heat, you can go with a small jalapeno, removing the seeds and ribs. If you’re a full blown heat fanatic, go for broke and throw in some hot Thai peppers. Or if you cannot tolerate heat of any kind, feel free to thinly slice some sweet bell peppers. Again, making this dish at home gives you the opportunity to customize to your liking.

Another reason to love this dish: it’s inexpensive! For about $6 you can get a pound of thinly sliced round steak at the grocery store. My amazing Pete’s Fresh Market sells this thinly sliced pepper steak that works perfectly. I like to put mine in the freezer for about 1/2 an hour which makes it easier to cut into strips (remember to always cut against the grain for maximum tenderness).

The rest of the ingredients are very simple and can be prepped while the beef is marinating, making this a dish that can be made on a busy weeknight with minimal effort.

Until next time, eat well, be well and love lots. ❤

Thai Beef with Basil

3 TBS Asian Fish Sauce (see Note 1>)

1 TBS soy sauce (either regular or reduced sodium or use Tamari for gluten-free option)

1 TBS brown sugar

1 pound thin round steak or top round (sometimes labeled “sandwich” or “pepper” steak)

1 TBS + 1 tsp vegetable or canola oil

1 jumbo sweet onion (about 1#) cut into 1/4-inch-thick slices

3 small chilies (we use serrano) seeded and sliced thin (See Note 2>

3 large garlic cloves, cut into long thin slices

2 tsp minced fresh ginger

2 cups of fresh, whole basil leaves (either Thai or Sweet basil)

In a medium bowl, combine fish sauce, soy sauce and brown sugar. Cut steak into thin strips against the grain (freezing the steaks for about half an hour will facilitate this proess). Toss with the marinade. Cover and let marinate either in the refrigerator or on the counter for 30 minutes.

Heat a skillet or wok over high heat, then add 1 TBS oil. Add the beef mixture along with the marinade and cook, stirring frequently just until no longer pink, about 1 minute. Do not overcook! Remove to a bowl and set aside.

Add remaining 1 tsp of oil. Add sliced onions and cook, stir frying until tender-crisp, about 3-5 minutes. Stir in chilies, garlic and ginger and stir fry for about 30 seconds to 1 minute.

Return beef to skillet and add basil, tossing until leaves begin to wilt

Serve immediately over rice.

Serves 3

Note 1> Fish sauce is must have condiment to keep on hand. Most large grocery store chains will carry it in their Asian or “International” aisle. You can also purchase online. It keeps for a very long time in the refrigerator and is a staple in Asian cooking.

Note 2> I always recommend using disposable food service gloves when handling hot peppers.

TOOLS OF THE TRADE:

A wok is not required for this dish or any stir fry for that matter. That said, a good well seasoned wok is worth its weight in gold and will last a lifetime. We purchased our 14″, flat bottom carbon steel wok from The Wokshop online for only $35. While you’re on their site, also check out their incredibly sharp kiwi knives made in Thailand. Super sharp, easy to use and clean and most important of all: AFFORDABLE!

Mom’s Amazing Dill Dip

My how time flies when you’re in the midst of a pandemic. Or not.

One would think 2 years of sticking close to home would spur me to cook more and post more recipes. Actually the former statement is true. The latter…..eh.

When I thought about actually taking photos, drafting a post, etc. a million other household tasks always seemed to take priority. 2021 was a very busy year for the expanded garden and our bees. We also took not one but three vacations last year which is unprecedented!

These past two months have been consumed with massive decluttering of the house and redecorating. Weekends come and go in a blink, and I find myself increasingly unable to focus on really, anything.

But enough with the excuses!

Yesterday I was prepping for my daughter’s birthday dinner with the family, and realized my mom’s famous Dill Dip has never graced the pages of my blog. What better time to get back to get back into my poor, neglected food blog and share my love of cooking with one and all, than with another treasured family favorite.

This dip has been been in the family for as long as I can remember. As you can see, it’s very simple but with one very special “secret” ingredient: Beau Monde Seasoning (which I spelled incorrectly on the recipe card!) I’m not sure how far back this seasoning dates, and no one is exactly sure what’s in Beau Monde Seasoning other than the Spice Islands Company, which owns the rights to the name.

I do know it’s an incredibly versatile spice blend. Ernest Hemingway even used it in his recipe for the ultimate hamburger.

And in this recipe that looks like it could have been a predecessor to my mom’s dill dip:

You can still still find Beau Monde seasoning in grocery stores where Spice Islands seasonings are sold. Or online at Amazon.com. Or head over to Food.com for a quick and easy substitute recipe.

Now back to this delightful dip that comes together in minutes with ingredients you’re likely to have on hand. I do prefer fresh dill to dried, but in a pinch you can use the latter and preferably of high quality like dried dill weed from The Spice House.

You can also lighten this up a litte but subbing low fat mayo and sour cream and serving with fresh veggies. This also makes a wonderful dip for cooked shrimp or smoked salmon on toast. Or add a teaspoon of lemon and serve alongside grilled or poached salmon.

Feels good to be back in the food blogging swing of things. My hope is to get some more recipes out in the coming months.

Until next time, eat well, be well and love lots. Now more than ever ❤


Mom’s Amazing Dill Dip

1 cup mayonnaise (either regular or Lite)

1 cup sour cream (either regular or Lite)

1 TBS minced onion (either scallions, red or yellow onion)

1 TBS chopped fresh dill (or 1 tsp dried)

1/2 tsp. Beau Monde Seasoning

Combine all ingredients in a bowl and chill for at least 1 hour before serving. Serve with chips and/or fresh vegetables (carrots, celery, peppers and blanched broccoli are great)

Yield: 2 cups

The Best of 2020

I know what you’re thinking: how can there possibly be a best of anything in 2020? A year where the hits kept coming, from the pandemic, to financial uncertainty, civil unrest and murder hornets. And yet somehow we slogged through, a little weary and yearning for a return to even semi-normal. As I sit at my desk with a cup of hot tea overlooking a yard that is now covered in icy snow, I’d like to reflect on the good that happened in 2020. There was a LOT of cooking, which is always good. So in that sense, 2020 was actually a very very good year.

*NEW RECIPES*

Working from home for several months gave me a bit of leeway when it came to dinner prep and also a rare opportunity to make a decent lunch for myself! There were a lot of “firsts” including pastitsio, homemade flatbread, gumbo, chocolate chip cookies that were actually amazing, and most recently the overnight, no knead bread that was a resounding success. Not to mention the many wonderful recipes I made in the Instant Pot (more about that later). Too many great recipes to list, so I decided to just pin them all onto one Pinterest board called “Pandemic Cuisine” . Over 75 comforting recipes. Check it out to see if anything new inspires you!

*NEW COOKWARE & APPLIANCES*

You know I’m always on the lookout for new gadgets and gizmos for the kitchen. Here are some of my favorite *new things from 2020:

Hamilton Beach 2-Way Coffee Maker – Just before the pandemic hit, we decided to ditch the Keurig and go back to the days of brewing a pot of (really really good) coffee. Loved this model that would allow me to brew one cup for the days when I was going into the office or an entire pot of coffee on the weekends. As it turned out, we were both working from home most of the year, so our timing could not have been more perfect! Makes superb coffee and added bonus: we found a small business right here in town that roasts their own coffee and delivers it for free. Win!

Instant Pot – Oh you know I held out on this one for a long time. I was convinced it was a fad that would go by the way of the bread machine and spiralizer. I was convinced it couldn’t possibly be better than my beloved slow cooker. Turns out I was wrong on all fronts. Everything we’ve tried has been a success and there’s something comforting about knowing I can get a beef stew on the table in an hour. Click here to check out some of my favorite Instant Pot recipes of the year. This goes in the “Win” column for sure.

Tramontina Gourmet Enameled Cast Iron Round Dutch Oven – Really a “must have” for any home cook, looking back I can’t believe I’ve been cooking for nearly 30 years without one! Inspired by the no knead bread recipes that were pandemic popular, I finally decided to treat myself. This model was highly rated and about 1/4 the price of the more expensive LeCrueset and Staub (waiting to hit big on the lottery to purchase one of those). Not only did it perform well for the no knead bread, I’ve used it for countless other dishes including my gumbo and stews. Added bonus: it came in this gorgeous dark blue!

OXO Good Grips Citrus Juicer – Sometimes the best purchases are the small, whimsical ones. I spotted this juicer in a cooking video and knew I HAD to own one. Amazon to the rescue (of course!). I already own a few juicers but none that both screen out the seeds AND have measurements on the cup. It rocks my world, even in a small way 🙂

*NEW FOOD FOLLOWS*

What better way to pass the time on lockdown than watching cooking videos! These two in particular brought great joy to an otherwise bleak and dreary March and April. More recently, we subscribed to MasterClass which has opened up yet another world of amazing cooking videos from renowned experts, like Thomas Keller, Alice Waters, Apollonia Poilane and Yotam Ottolenghi to name a few.

Pasquale Sciarappa – This man is pure joy and his videos will lift your spirits. He sings, he dances, he drinks wine. Oh, and his recipes: AMAZING! Just made his Italian Wedding Soup featured in the video below and it was out of this world good. Also check out some of his garden videos. This man can grow tomatoes like no one’s business! You can find him under the name “Osara Recipes” on YouTube or on Facebook. You’ll find yourself dancing along saying “Salute Cin Cin”!

Michael Symon – Chef Symon’s daily #SymonDinner videos were often the highlight of my day in March and April. With the help of his assistant Liv, he filmed daily dinners out of his home and they are everything a good cooking video should be: informative, relaxed and sprinkled with a little humor and occasional appearances by his VERY cute puppy, Norman. He patiently answered questions from his viewers and amassed quite a following during this period. Although he stopped producing videos around the end of April (or May), you can find them on his Instagram page (@ChefSymon) or on YouTube under the hashtag #SymonDinners. Thanks for keeping us sane, chef!

*MY FAVORITE FOOD BLOGGERS OF 2020*

I follow so many food blogs , honestly I’ve lost track. In going through my recipes from 2020 though, two bloggers stood out among the rest, and I find myself returning to their sites over and over again:

Recipe Tin Eats – Nagi was born in Japan but grew up in Sydney, Australia. Her blog is everything I’d love mine to be if I had the time: fresh straightforward recipes, entertaining prose and very well organized. Her Soft flatbread recipe (discussed below) alone was one of my greatest finds of 2020. Also love her photos and updates on her adorable golden retriever, Dozer.

Jo Cooks – Another blog where I want to make EVERY recipe posted! Joanne Cismaru is the blogger and also a cookbook author (you can find her book “30-Minute One-Pot Meals” on Amazon). I first discovered her when searching for paella recipes and ended up making her amazing Chicken and Seafood Paella. Since then, I’ve tried dozens of other recipes from her blog, each one a solid “win”. Great layout as well, with easy access to slow cooker, instant pot and 30-minute recipes.

*NEW TRICKS AND TECHNIQUES*

One of the greatest joys of cooking is learning new techniques and experiences and mastering others. There’s nothing quite like the first time you bake your own loaf of bread or make that perfect vinaigrette and realize you’ll never go back to bottled dressing again. For me, 2020 gave me many opportunities and many “firsts” Here are some of my favorites:

Jacket Potatoes – For many decades my method for baking potatoes was 1 hour in a 400 degree oven. Ho hum. Then in 2014, a Chicago Tribune columnist, John Kass, published a story on salt baked potatoes. It was such a game changer, I wrote a blog post about it. In 2020, yet another revelation in potato baking: the British version called “Jacket Potatoes”. Actually a very simple approach scoring the potatoes but instead of one hour, they’re cooked for two hours. Yes…TWO! Trust the process because these potatoes turn out unbelievably tender and fluffy with a nice crisp skin. Game changer once again!

Cajun Roux – This is where the nerdy/geeky side of me comes to life. Mastering the art of making a dark cajun roux. We had just purchased some gorgeous fresh gulf shrimp from the fabulous Fabian Seafood Company and decided to make gumbo. THE key ingredient (aside from the shrimp) is the perfect dark roux. I was thrilled to come across this tutorial online that walked us through the process and allowed us to master this technique. I literally had my phone in one hand staring at this photo of the stages of roux while stirring with the other.

Easy Soft Flatbread – As I am not a baker by nature, I am always fascinated by how flour and water can be transformed into just about anything just by following a different technique. In this recipe, flour is combined with a little milk and butter to create THE most perfect fresh flatbread you’ve ever had. I served ours with kebobs this past summer then used the leftovers to make some fabulous pizzas for lunch the next day. Also one of my favorite bloggers of the year (Recipe Tin Eats). Great recipes and I love Australian based Nagi’s stories and posts about her dog, Dozer.

Overnight No Knead Bread – Saving the best for last and there’s a reason it was featured on my “Best of 2020” photo grid. At the start of the pandemic, recipes for no knead bread started appearing everywhere. Flour was flying off the shelf as people were hunkering down and baking up a storm. As mentioned previously, I purchased a Dutch Oven precisely to make this bread but didn’t actually get around to it until late December. I remember looking at my sad looking dough the next morning and thinking there was not a chance in you-know-what that it would turn out.

Turns out I was wrong. As wrong as I was about the Instant Pot. MORE wrong, in fact. This was one of the most glorious breads I have evern eaten! Not only did it look like something that came out of a French boulangerie, it had incredible flavor and texture. Again…flour, yeast, water and salt. Transformed. Perhaps THE best thing to come out of 2020 (other than my new garage door).

If you’ve made it this far in my post, thank you! In my perfect world, I would be posting way more often, but I am grateful for the time I do have to pop in here from time to time and share my love of cooking with you. When you tell me you’ve made one of my recipes and it was great, that truly makes my day.

I wish everyone health and happiness in the new year and a return to peace and normal. And as always, eat well, be well and love lots.

Smoky Steak & Bean Chili

Today’s post will be more prose than photos. In part because I didn’t really intend for this to be a blog post and didn’t stop to take photos of the ingredients or the process. Sometimes, I just want to cook, and that’s exactly what I did on a quiet, blustery Saturday evening.

My “go to’ chili recipe has evolved quite a bit over the decades. What started as a very standard ground beef/onions/chili powder and tomato dish scrawled on a small index card has evolved into something infinitely more complex, with layers of smoky spice. Chili is not an exceptionally difficult dish to make. Quite the opposite. But it is also something that shouldn’t be rushed. Patience and attention to details will certainly pay off in the end.

Here, I offer many options for layering on that smoky heat, depending on your taste preference. The basic recipe calls for the addition of ground Chipotle pepper which is derived from smoked jalapeno peppers. Available in many grocers and from online vendors like The Spice House:

For an added layer of smoky heat, you can char a poblano pepper over an open flame on your stove or grill, let it steam, then remove the skin, chop it up and saute with the rest of the vegetables.

Still not enough heat for you? Then add a tablespoon or two of canned chipotle peppers in adobo sauce and get out the fire hose! 🔥

Last weekend’s chili was made special by the addition of Anaheim peppers from our garden that we charred on the grill and also topped with some fresh cilantro I started from seed about a month ago.

And well what do you know, I did have some photos after all! Thank you for reading, following, sharing and supporting my little blog. During these crazy uncertain and stressful times, I hope you can all find comfort in the sharing of food with others (even if you’re hosting a Zoom dinner party or Happy Hour).

Until next time, eat well, be well and love lots. Now more than ever ❤


Smoky Steak & Bean Chili

3 TBS light olive oil (or vegetable or canola oil)

2 pounds sirloin steak, cut into small cubes (see NOTE 1)

1 large yellow or white onion, diced

3 cloves garlic, minced

1 large or 2 medium, green bell peppers, chopped

1 can (28oz) plum/whole tomatoes or stewed tomatoes undrained

1 can (28oz) tomato sauce

1 can (6 oz) tomato paste

1 cup water (or more as needed)

2 1/2 TBS chili powder, divided (see Note 2)

1 TBS each ground cumin, oregano (preferably Mexican oregano), basil

1/2 to 3/4 tsp ground Chipotle pepper seasoning

2 tsp coarsely ground black pepper

1 tsp salt

2 cans (15.5 oz each) dark kidney beans, drained and rinsed

**OPTIONAL ADD INS FOR EXTRA HEAT**

1 poblano pepper – charred directly over a flame, then place in a ziploc bag for about 15 minutes to steam. Remove skin and seeds, then chopped.

1-2 TBS chopped chipotle peppers in adobo seasoning

**TOPPINGS**

Sour cream

Diced avocados

Shredded cheese or crumbled Mexican Cheese Blend (I love the Mexican 3-Cheese blend from Supremo)

Lime wedges

Directions:

  1. One hour before you begin to cook, place the meat in the freezer (this will make it easier to cut up). While meat is in the freezer, prepare remaining ingredients.
  2. Remove meat and slice into 1/3-inch cubes. Toss with 1 TBS of the chili powder. Heat oil in a large Dutch Oven until shimmering. Add about half the meat, spreading out evenly. Let brown for a minute or two, then stir to brown evenly on all sides. Remove any liquid that forms with a bulb baster. Transfer meat to a separate plate and brown the remaining meat, then remove to plate.
  3. Add a little oil to pan and add onions and peppers (this includes roasted poblano peppers, if using). Turn heat down to medium and continue sauteeing until just starting to soften, about 5 minutes. Adjust heat as necessary to avoid scorching. Add garlic (and Chipotle peppers in adobo if using) and saute an additional 30 seconds.
  4. Turn heat up and add water to pan, scraping the bottom with a spoon to loosen any brown bits (aka “fond”) Remember: FOND = FLAVOR! Then add the whole tomatoes, tomato sauce, tomato paste and seasonings, including the remaining chili powder. Bring to a boil, then partially cover. Reduce heat and simmer for about 45 minutes until meat is tender.
  5. Drain and rinse beans and add to chili. Simmer an additional 15 minutes. Taste and adjust seasonings if necessary. Serve in deep bowls with your choice of toppings.

Serves: 8


Note 1) You can certainly substitute ground beef for sirloin steak. I tend to avoid ground beef labeled as “chili meat” unless it comes from a trusted butcher. Too often it’s made with inferior cuts of meat and can be full of fat and gristle.

Note 2) Chili powder is the foundation of all chili recipes and for that reason, you want to make sure what your using is of the best quality and FRESH! My favorite by far is Penzy Spice’s “Chili 9000” which is a very unique and complex blend, with a hint of cocoa powder. For a more “traditional” but equally high quality blend, check out Savory Spice’s Medium Chili Powder. And last but not least, a reliable grocery store brand from Simply Organic.

Bob’s Best All Purpose Beef Rub

My husband, Bob,  has always been the more intuitive cook between the two of us.  Early on in our marriage while I could barely cook a package of frozen green beans without reading the instructions,  he’d be whipping a big pot of his infamous bean soup, chili or his favorite “Linguine á la Olive”.

No recipe required!

Thirty some odd years later, he is still creating and recreating various “Bob Specials” in the kitchen.  He’s mastered making calzones from scratch (he has an entire photo album on his Facebook account devoted to “The College of Calzone Knowledge”)

Indiana-style pork tenderloin sandwiches

and he makes an incredible filet of sole with lemon butter sauce

Why not add a snazzy beef rub to the repertoire!

This rub works on all things beef: burgers, steaks, roasts.  Pork and chicken?  Go for it!  Why two different kinds of salt and two different kinds of pepper?  Who knows.  Perhaps someday Bob will reveal the method behind his mad genuis.  Until then, feel free to take some liberties with this one.  You have Bob’s blessing.
Until next time, eat well, be well and love lots

Bob’s Best All Purpose Beef Rub

1 TBS finely ground Pink Himalayan Sea Salt
1 TBS coarse Kosher Salt
2 TBS Dark Brown Sugar
1 TBS coarse ground Black Pepper
1 TBS finely ground White Pepper
1 TBS coarsely ground Cayenne Pepper
1 TBS Garlic Powder
1 TBS Onion powder
1 TBS Dried  Parsley
1 TBS Dried Thyme
1 TBS Dried Oregano
1 TBS Dried Marjoram
Instructions:
Combine all ingredients in a shallow bowl or dish. Use a fork to crush and disperse any lumps. Stir thoroughly with fork. Pour contents of bowl into a small Zip-Loc bag. Seal, then shake thoroughly. Store rub in bag or transfer to small jar for future use. Shake rub thoroughly before each use. Rub is good on red meat, chicken, pork and seafood.
Yields: a generous 3/4 cup of rub

Grilled Tri-Tip with Garlic & Fresh Herbs

Garlic & Herb Tri-Tip_Dinner Is Served
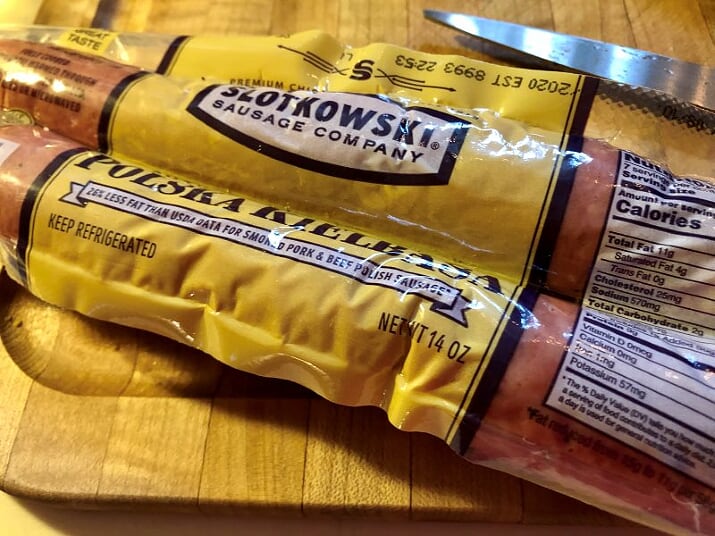
You know I sure do love a good marinade and my blog has quite a few of my favorites, including  Kentucky Bourbon MarinadeJuicy Sirloin Steak Marinade and my Hoisin Marinated Steak.  That said, there are many days where time doesn’t permit me to marinate a steak for a leisurely 12 hours.  That’s when I turn to fresh herbs and garlic for a simple, summery rub for steaks. This time, featuring one of my very favorite cuts of beef: a Tri-Tip Roast. Toss together some fresh tomatoes/basil/mozz and grilled bread and  you have can have a perfect patio dinner ready in no time!Garlic & Herb Tri Tip _ DIS 1

The Herbs

This recipe uses a combination of fresh tarragon, thyme and rosemary.  I will admit the first time I tried this combination, I was a bit skeptical about combining rosemary with tarragon (both have very strong flavor profiles), but it turns out they work in complete harmony.  This is one recipe that I would not recommend substituting dried herbs or garlic powder for the fresh garlic.  The fresh herbs form a nice crust and really add that flavor punch.Garlic & Herb Tri Tip _ DIS2

The Meat

Now here, you may certainly substitute any cut of steak or beef roast.  I’m featuring a tri-tip because it happens to be one of my most favorite cuts of beef and my local meat market (shout out to Casey’s Market in the western suburbs of Chicago) always has some beautifully trimmed tri-tips available.

The tri-tip is a triangular cut from the bottom sirloin. Well marbled and so flavorful and tender as can be as long as you cook to medium or (better) medium-rare. Note that if you’re a fan of well done steak, this is not the cut for you!

You can roast tri-tips in the oven, but we especially love them on the grill over coals and few handfuls of soaked wood chips.  Note that this cut often has sections of grains running in different directions. You always want to make sure you’re cutting against the grain to ensure that melt-in-your-mouth texture.Garlic_&_Herb_Tri_Tip___DIS3

The Extra Goodies

Nothing says summer quite like a fresh tomato salad. No recipe needed. Just toss fresh tomatoes with herbs and a fresh cheese of your choice (mozzarella and feta are my “go to’s”), a drizzle of extra virgin olive oil and even some balsamic vinegar, salt and freshly ground pepper.  A welcome change from cooked vegetables. Perfect for parties and large scale entertaining and holds together nicely at room temperature.

Grilled sourdough bread is another favorite summer side and a welcome departure from baked or roasted potatoes.  My quick and easy method is to brush slices of sourdough bread with olive oil and a little garlic salt and pepper.  Then grill over a hot fire for about a minute per side.

Together you have the ultimate summertime steak dinner perfect for patio entertaining.

Until next time eat well, be well (especially this one!) and love lots

Dinner Is Served Signature

Garlic_&_Herb_Tri_Tip___DIS6

Grilled Tri-Tip with Garlic & Fresh Herbs

  • 1 trip-tip roast, about 2-3 pounds (see Note 1>)
  • 2 TBS chopped fresh thyme
  • 2 TBS chopped fresh rosemary
  • 1 TBS chopped fresh tarragon
  • 2 garlic cloves, minced
  • 2 tsp salt
  • 1 1/2 tsp coarsely ground black pepper
  • 1 TBS olive oil
  • Smoking chips (I love the Jack Daniels Whiskey Barrel Chips), soaked (optional)

About 60 minutes prior to grilling, combine fresh herbs with garlic, salt and pepper.  Pat the roast dry then brush with olive oil.  Place on a sheet pan and coat the meat with the herb seasoning mix. Let rest at room temperature while your grill heats up

Set up your charcoal grill for indirect cooking.  When ready, sear roast over hot part of grill, about  5 minutes per side, until browned.  If using wood chips, drain and throw onto the hot coals.  Move the roast to the cooler part of the grill.  Insert a meat thermometer if using and close the lid.  If you’re using a probe thermometer (highly recommended) you want to cook until the internal temperature reaches 130° for medium rare.  Depending on the size of your roast, that should be about 20-30 minutes on indirect heat.  If you’re not using a probe thermometer, check the internal temperature with an instant read after 20 minutes.

Remove roast from grill and let rest for 10-15 minutes before carving (see NOTE 2> for carving instructions).  Serve with a tomato salad on the side and grilled garlic bread.

Serves: 4-6 depending on size of roast


NOTE 1> This fresh herb rub will work on any type of steak. If tri-tip roasts are not available, a flank steak is a good substitute.  Just reduce the cooking time accordingly.

NOTE 2> I promise this will be one of the most flavorful and tender cuts of meat you will ever have as long as you don’t overcook it and….carve it properly.  As its name suggests, a trip tip roast usually has three sections going in different directions. For each section, you want to carve against the grain.  The picture below is a great visual aid.  It helps to inspect the roast before you add the herb rub, to confirm direction of the grain.2020-08-15 17_27_16-Window


Grilled Smoked Sausage, Pineapple & Pepper Skewers

Grilled Smoked Sausage, Pineapple Pepper Skewers-Dinner Is Served

“What a long strange trip it’s been” – Grateful Dead

What can I say about 2020 thus far that hasn’t already been said? Surreal. Stressful. Life altering.  All the above?

In the midst of it all, and stuck at home, many turned to cooking and gardening as sources of comfort.  Which honestly, we’ve been doing now for close to 30 years.  Yet I never thought I would see the day when flour was hard to come by and seed catalogs were sold out of inventory!

With a slight return to normalcy now in the Chicagoland area, summer in high gear, and my backyard filled with flowers, buzzing bees and cicadas…almost every night is grill night. Right now, skewers are my go dinner option for busy weeknights and I love love LOVE these smoked sausage, pineapple, pepper skewers basted with a savory pineapple bbq sauce

.Smoked Sausage Pepper and Pineapple Skewers - DInner Is Served3

These take just minutes to assemble with smoky sausages (if you’re from Chicago, that means smoked Polska Kielbasa)20200620_233804774_iOS
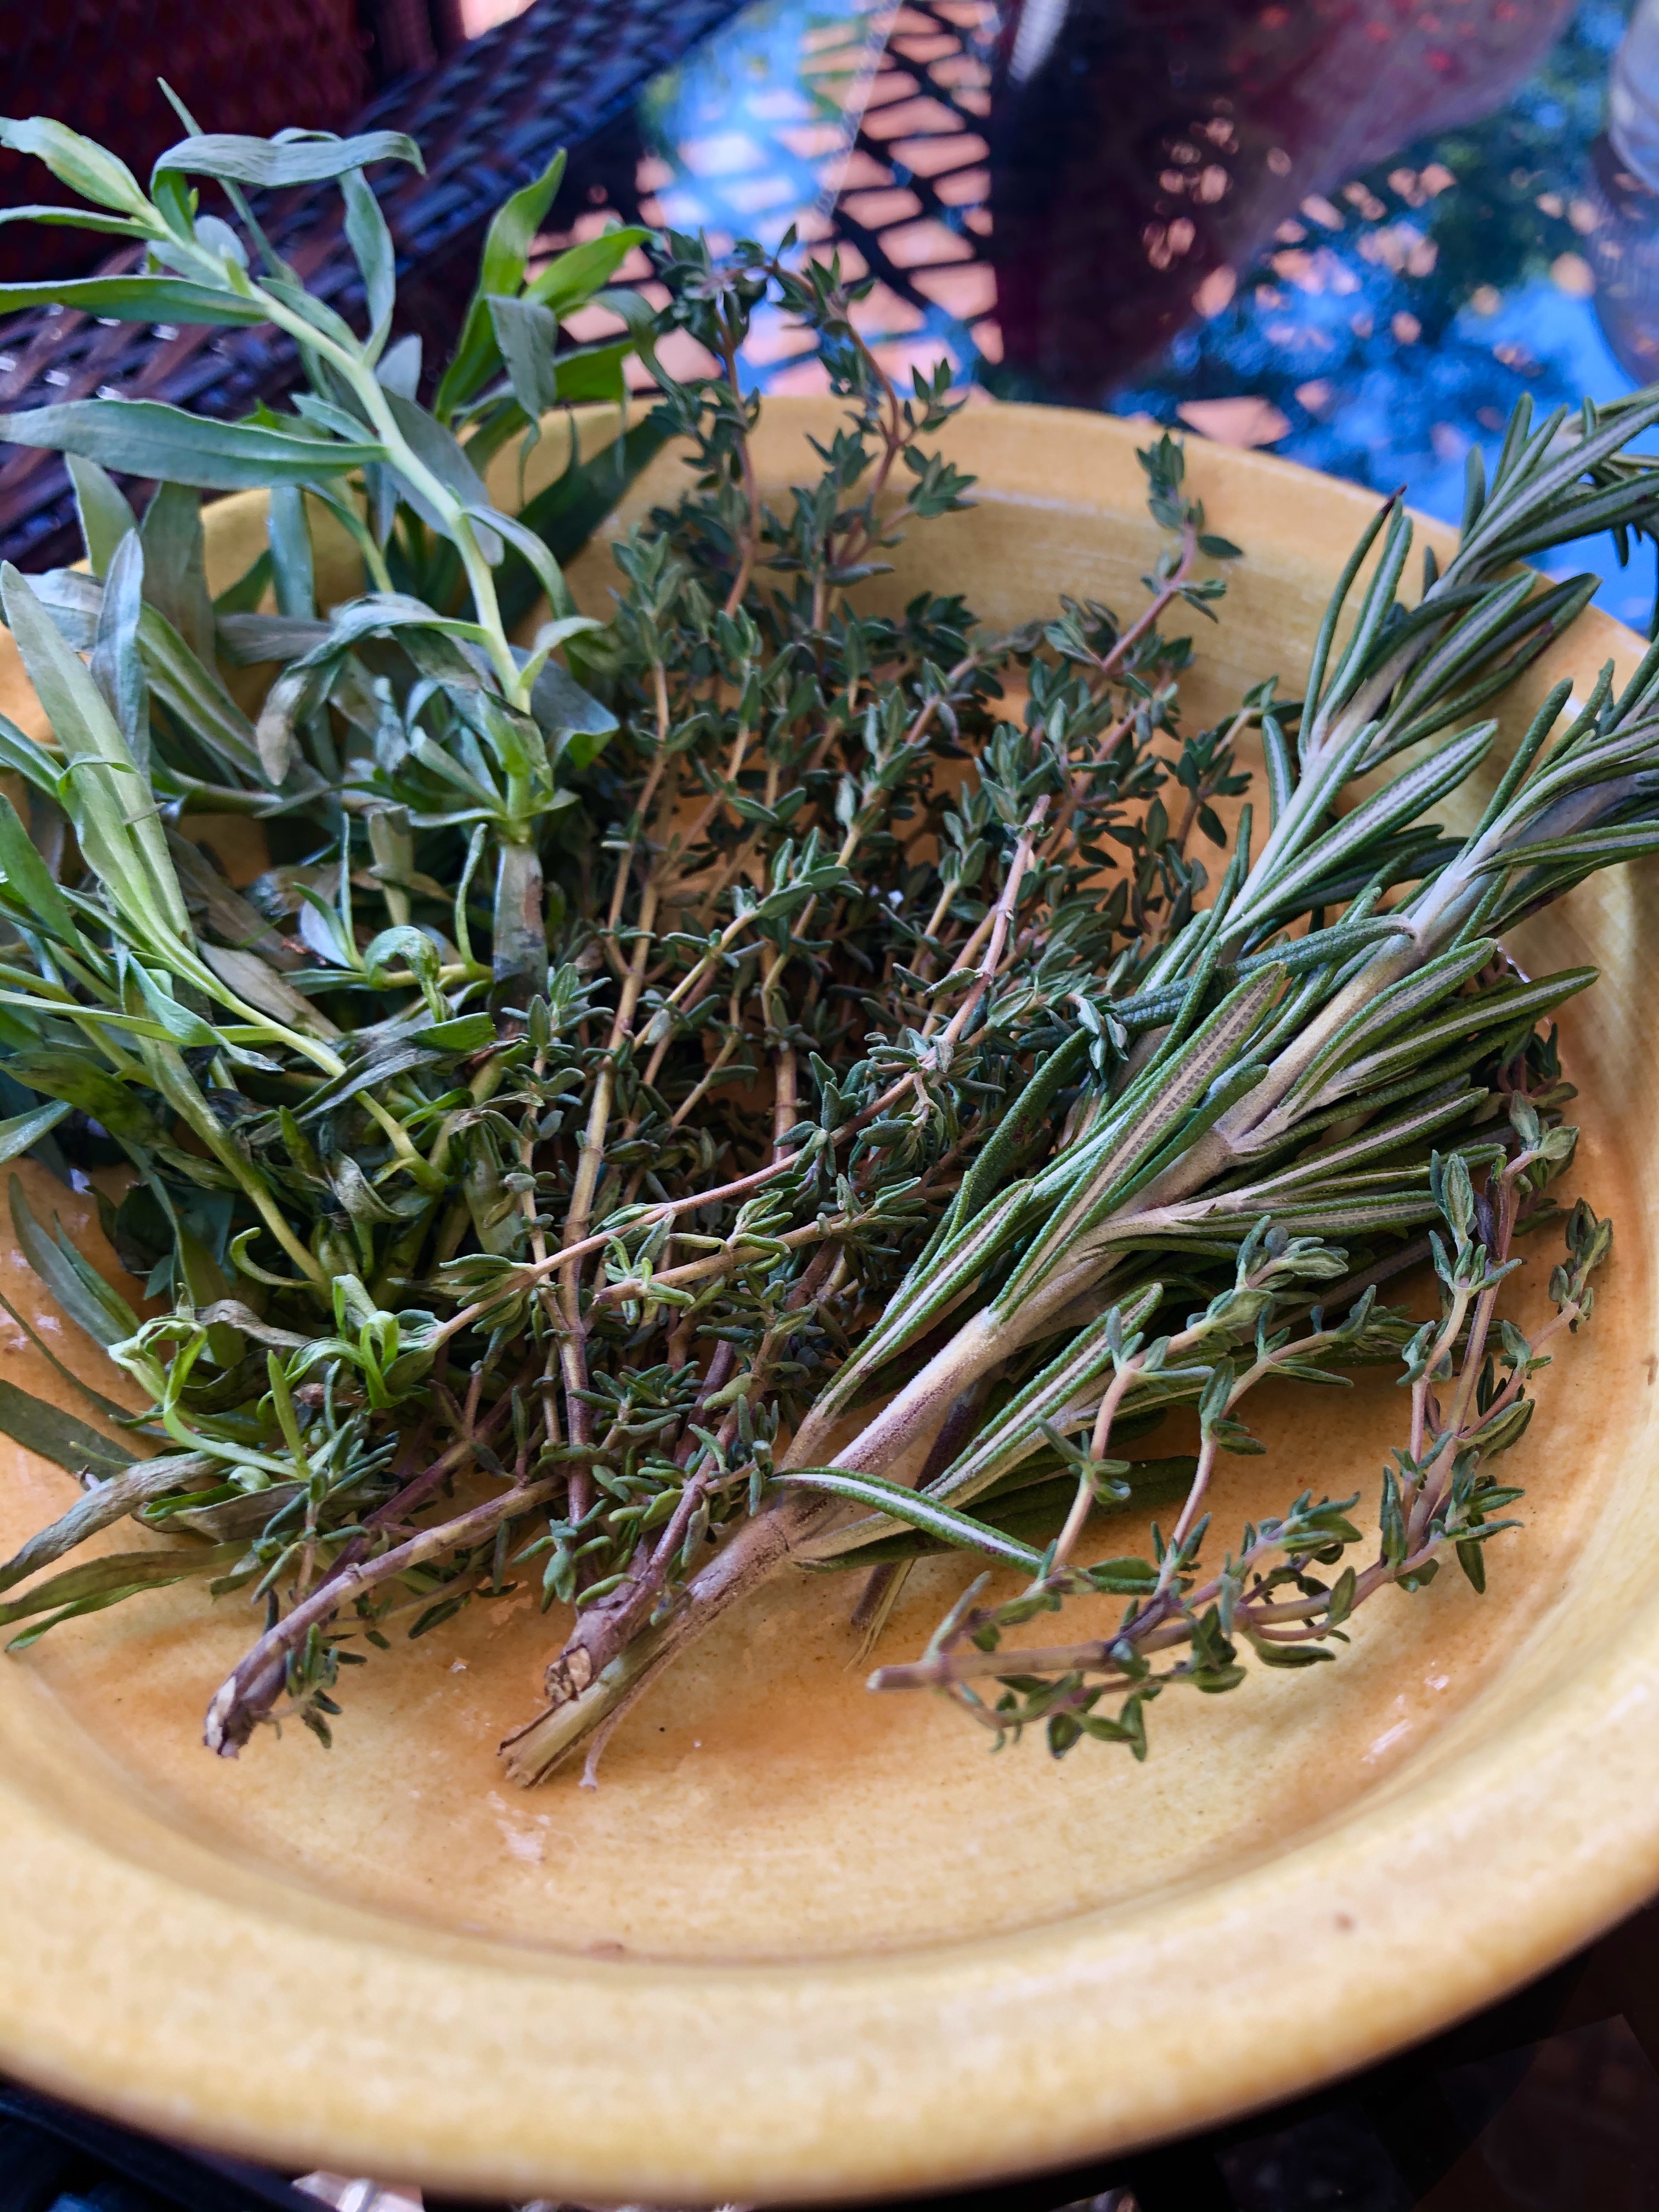
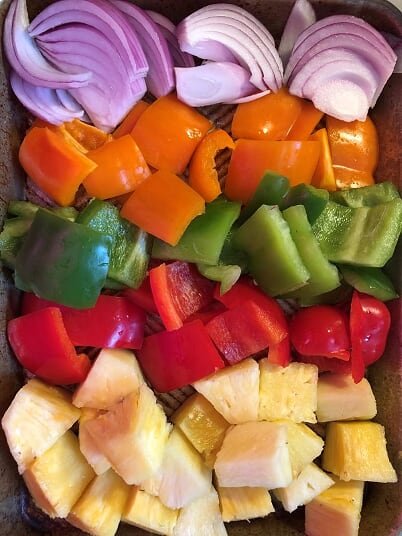
Sweet bell peppers, fresh pineapple and red onions Smoked Sausage Pepper and Pineapple Skewers - DInner Is Served1jpg

IMG_4151

Glazed with a pineapple bbq sauce and served with additional sauce for dipping. As easy as whisking in some pineapple juice to your favorite bbq sauce. Or, look for tropical bbq sauces at the store, such as Sweet Baby Ray’s Hawaiian BBQ Sauce or if you happen to live in the Chicagoland area, Bartolini’s in Midlothian sells their amazing Pineapple Bourbon Chipotle BBQ Sauce locally.

IMG_4169

Perfect for a large gathering…you can easily assemble these ahead of time.  Also consider making a “kid friendly” version with hot dogs!

Until next time, stay cool and most of all, be safe and healthy ❤

Dinner Is Served Signature

IMG_4096

Grilled Smoked Sausage, Pineapple and Pepper Skewers

  • 14-16 oz Smoked (fully cooked) Sausages (such as Kielbasa)
  • 1 each: green, red and orange sweet bell peppers
  • 1/2 of a large, fresh pineapple
  • 1 small red onion
  • 3/4 cup bbq sauce
  • 5 TBS pineapple juice (see Note)
  • Metal or wooden skewers

Slice sausages about 1-inch thick.  Seed peppers and coarsely dice into approximately 1 1/2-inch squares.  Core pineapple and cut into 1 1/2-inch pieces.  Thread onto skewers.

In a small bowl, combine bbq sauce and pineapple juice.  Reserve about 1/3 of a cup for dipping and set aside.  Brush about half of the remaining sauce evenly onto the skewers and place on a hot grill, turning and basting for about 10 minutes, or until slightly charred.

Serve with a side of steamed rice and extra sauce for dipping!

Serves 4

NOTE> If you can find pineapple bbq sauce in your neck of the woods, no need to add additional pineapple juice.  Just use it straight out of the jar.  Happy grilling!Grilled Smoked Sausage, Pineapple Pepper Skewers-Dinner Is Served

Instant Comfort Beef Stew

Instant Comfort Beef Stew Dinner Is Served3
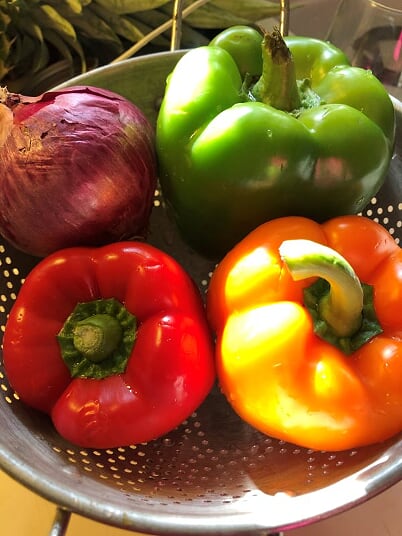
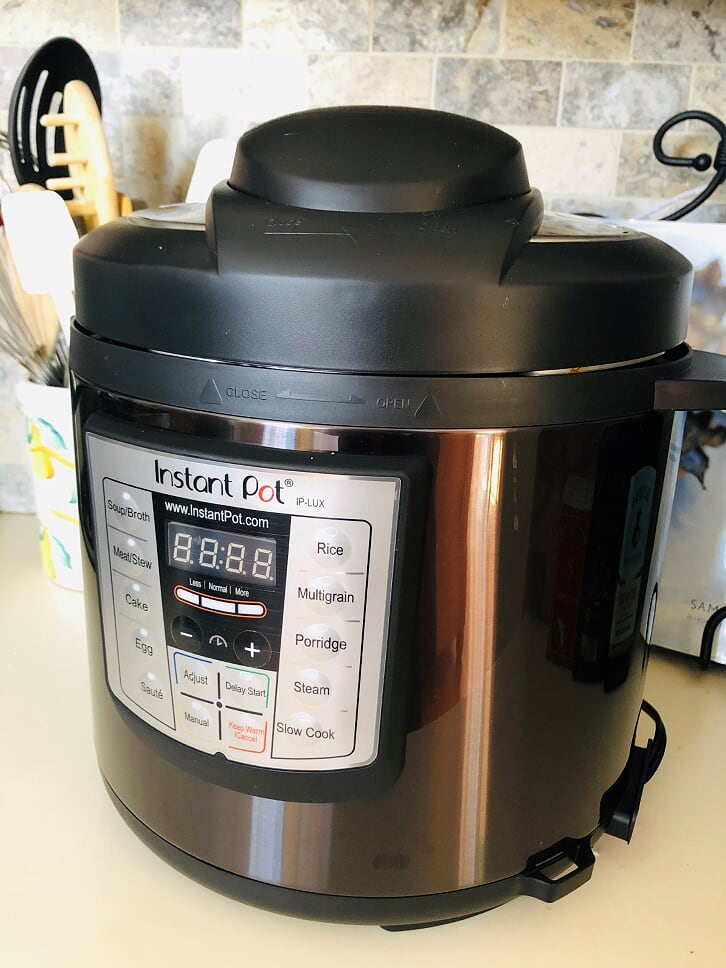
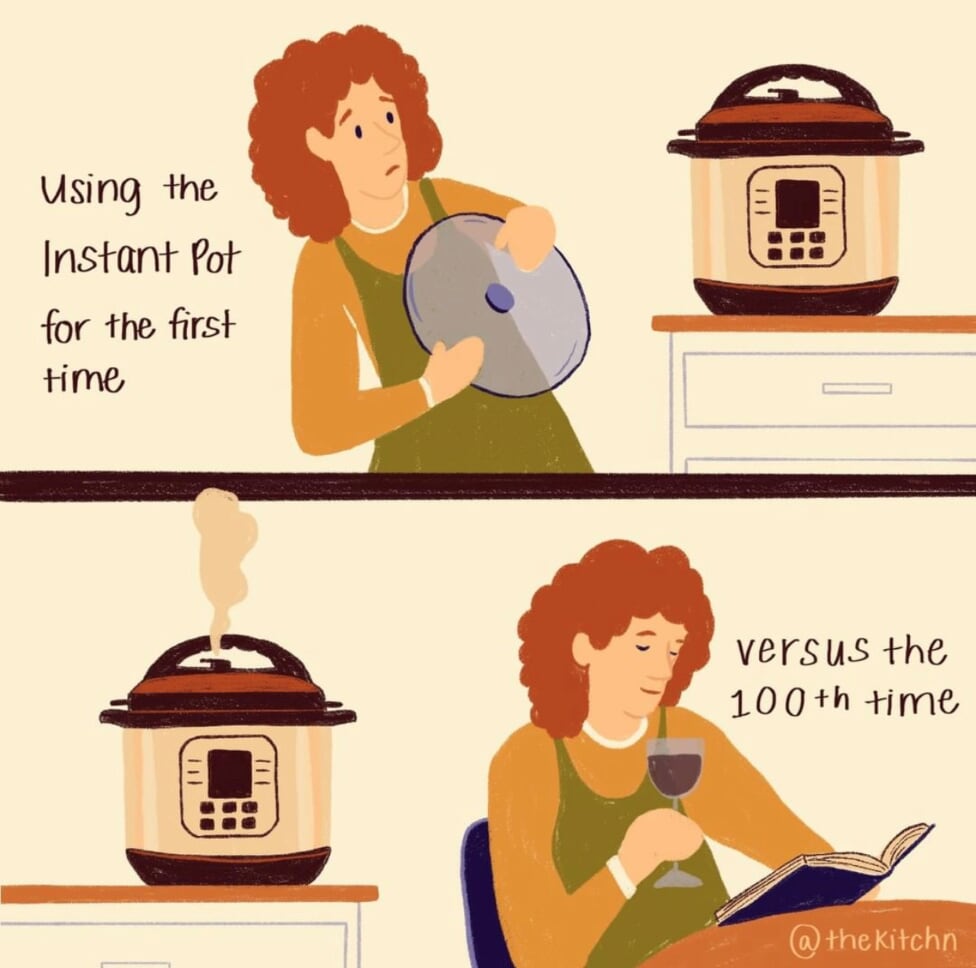
My friends, I finally FINALLY jumped on the Instant Pot bandwagon.   Not willingly, I might add.  We recently acquired not just one Instant Pot, but two! Which is a long and silly story so I will spare you the details.  But, here I am, with an appliance I swore on a stack of cookbooks I would never own.

After breezing past every Instant Pot recipe that popped up in my Inbox and graced the pages of Pinterest.  There was no way I was going to get suckered into buying a gadget that I was sure would find its way to the appliance graveyard in my basement, next to the bread machine and ice cream maker.

But curiosity got the best of me, so I decided to give it a go. After carefully considering all the recipes to try for its maiden voyage, I settled on a hearty beef stew figuring I wouldn’t be out all that much if it didn’t turn out. Plus it was a Saturday night and I knew if I blew up my house, we could always just go out to dinner.20200216_181752903_iOS

I will admit, glancing at the many pages of warning and CAUTION, I was a bit uneasy, as in I thought it might be safer to use a flame thrower to cook dinner.  And the first time I saw steam sputtering out of the valve, I ran for cover.  But with my husband’s assurances, and some Googling to make sure we were doing things the right way, I am pleased to say the outcome was….wonderful! 20200216_024535000_iOS

In just 30 minutes of cooking (plus a little more for the warm up and post cooking pressure release), the darned Instant Pot produced exquisitely tender pieces of beef, carrots, potatoes, along with a rich savory broth.  I tweaked the original recipe a bit to suit my liking and I can state with confidence that this stew is family approved and now blog worthy.

I still think the Instant Pot is more suited to my weekend cooking and I’m trying to figure out where to store it in my tiny kitchen that has no storage space.  But otherwise, I look forward to the many Instant Pot adventures that await!

Until next time, eat well, be well and love lots.

Dinner Is Served Signature


Instant Comfort Beef Stew*

1 tsp light or regular olive oil

1 1/2# boneless chuck roast (or 1# beef stew meat) See Note 1>

1 med/small onion, minced (about 1/2 cup)

2 cloves garlic, minced

1/2 cup dry red wine

3 cups low sodium beef stock (preferably homemade or Swanson’s Artisan Beef Broth)

1 can (14.5 oz.) crushed tomatoes (my fave: Muir Glen Fire Roasted)

1/2 TBS prepared horseradish

1/2 TBS Worcestershire sauce

3 cups baby potatoes or larger red skinned potatoes cut into 1-inch cubes

2 cups carrots, cut into 1-inch cubes

1 bay leaf

About 3 sprigs fresh thyme or fresh rosemary (or 1 tsp dried thyme or rosemary)

Salt and cracked pepper

2 TBS cornstarch

3 TBS water

Chopped fresh parsley (optional)

  1. Trim chuck roast of excess fat and cut into 1 1/2-inch cubes. You should end up with about 1# of stew meat. Pat dry with paper towels and season with salt and pepper.
  2. Heat oil in a skillet over medium high heat. Brown the stew meat in batches, until well browned on all sides, removing beef to the Instant Pot.
  3. Add a little additional oil if needed. Saute the onion for a few minutes until lightly browned. Add minced garlic and continue to saute for about 30 seconds. Remove and add to Instant Pot with beef. (See Note 2> about browning).
  4. Add red wine to skillet and bring to a boil, scraping up any browned bits. Pour over beef.
  5. Add beef stock, potatoes, carrots, crushed tomatoes, horseradish, Worcestershire sauce, bay leaf, herbs and additional salt & pepper to taste. Stir to combine.
  6. Set to manual pressure cooking for 30 minutes (refer to your owners manual).
  7. Once the cooking cycle ends, allow Instant Pot to release pressure naturally for at least 15 minutes.
  8. Whisk together cornstarch and water, then whisk into stew, stirring until stew has thickened slightly. Remove fresh herb stems (if using). Adjust seasonings and serve with chopped parsley.

Serves 4-6

Note 1> I’ve mentioned this before but it bears repeating: cutting up your own stew meat takes very little time and allows you to control the amount of fat in the meat and also ensures uniform size.  Precut stew meat is sometimes “mystery meat” and varies in quality.

Note2> You absolutely can brown the meat and onions in your instant pot and save yourself from washing a skillet.  But, I found my meat didn’t brown as nicely as it does on the stove and I wasn’t getting those lovely browned bits (called “fond”) that add such depth to any sauce.

*Recipe adapted from A Mind”Full” Mom food blog